For better data management and also giving access to your locations, you can segregate all your locations by grouping them into manageable folders.
Examples for grouping locations
- Type (premium, hospitals, franchise, etc)
- Geography (US, NZ, NY)
- Clients Names (for client locations)
Accounts that have collaborative teams managing location data can assign folders to a particular user/a team of users invited to the dashboard.
Organizing Data into folders:
-
Access Locations manager from the under the Content tab in the overhead navigation bar.
- Choose a location that you want to assign to a folder. Click the more options/hamburger sign adjacent to the location name and click on Move to.
-
To add a location to an existing folder, type in the name of the folder and select from the available folder options and click Apply.
-
To create a new folder, select the create new folder option.
Note: No two folders can have the same name.
Add Multiple Locations to a Folder
Select the locations you want to assign to a folder by selecting the checkboxes against the Location.
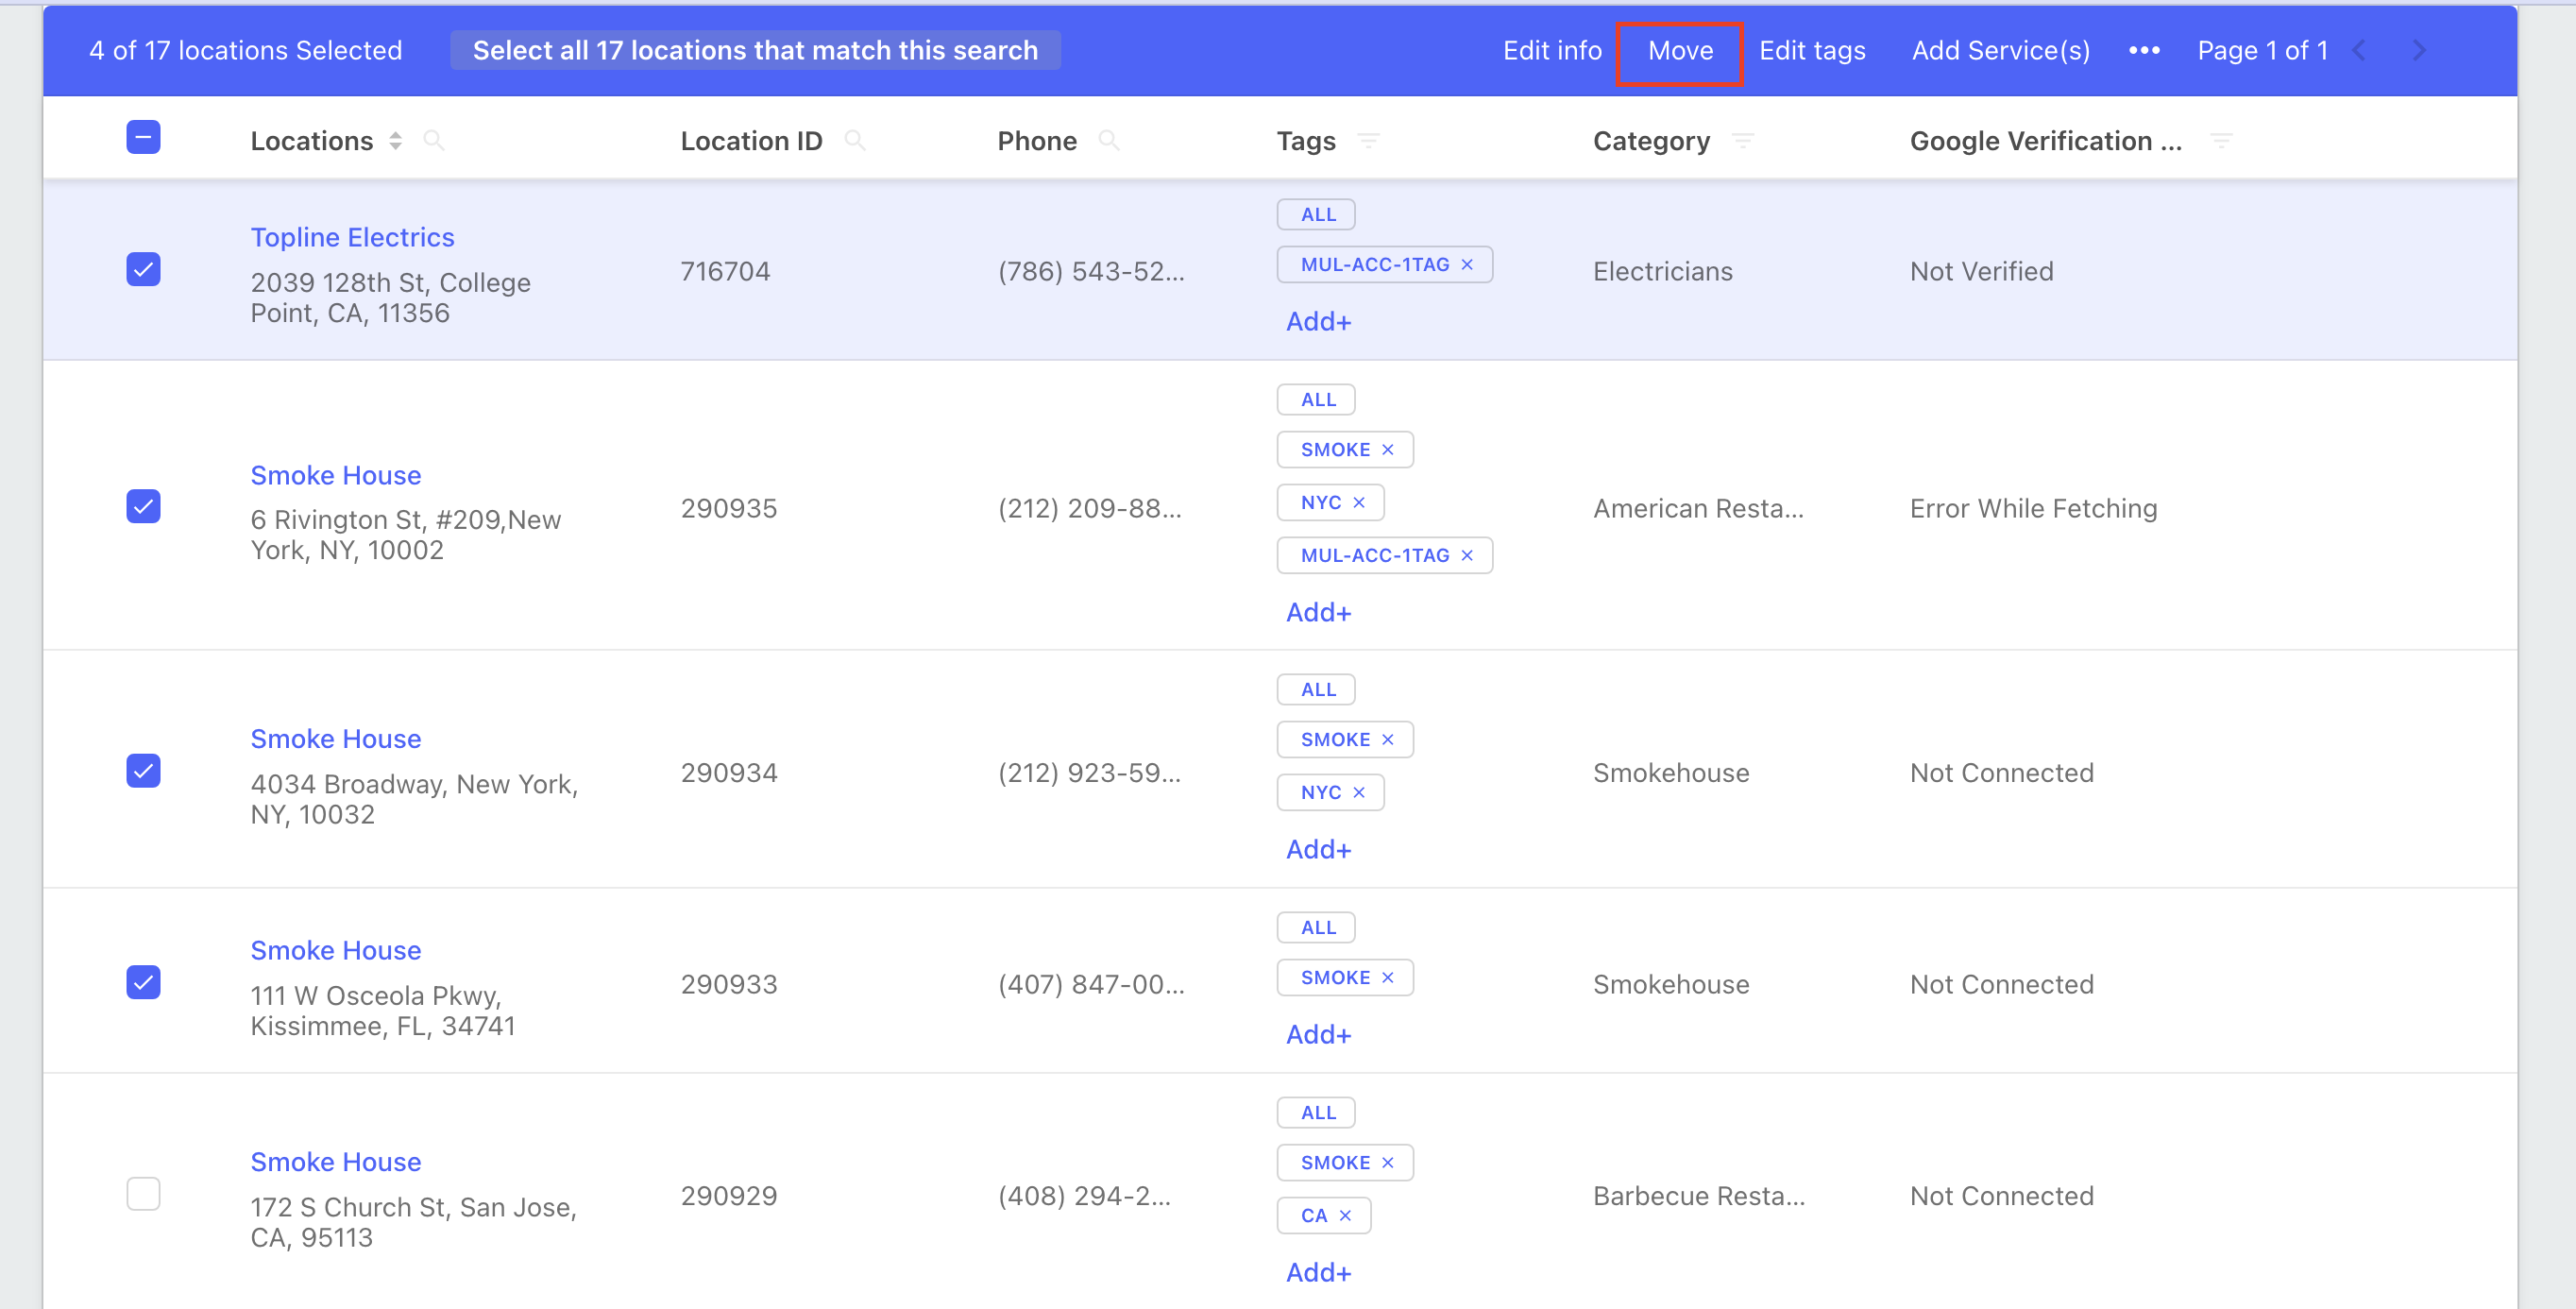
Click Move Option in the overhead bar.
Once you have selected the locations, follow the same instructions as added above to assign a folder to the selected locations.
- To add locations to an existing folder, type the name of the folder and select from the suggestions.
- To add these locations to a new folder, select the +create a new folder option.