How to bulk import leads
Importing leads in bulk saves you time and ensures your sales team has the most updated and complete list of prospects. In Synup OS, you can upload leads via a CSV file and map your data to system fields or custom fields.
This guide walks you through the entire process, including best practices to follow before you begin.
❗ Things to Ensure Before Importing Leads
Before you upload your CSV file, please review these important guidelines:
Mandatory Fields:
Make sure all mandatory fields (with asterisk next to them) are present and filled in the CSV file.
Synup ignores case mismatches (upper/lowercase) but spaces or character mismatches will cause errors.
Contact Information Fields:
Don’t use comma-separated values for email or phone number.
Data Formatting:
Remove extra spaces at the beginning or end of words.
Accepted date formats:
MM/DD/YYYY
ISO format (2025-08-21T14:06:44.675Z)
Ensure your CSV file is UTF-8 encoded (most exporters already do this).
Duplicates:
Leads with the same email ID will be considered duplicates.
Deal size’s currency will default to your workspace currency.
Steps to Import Leads via CSV
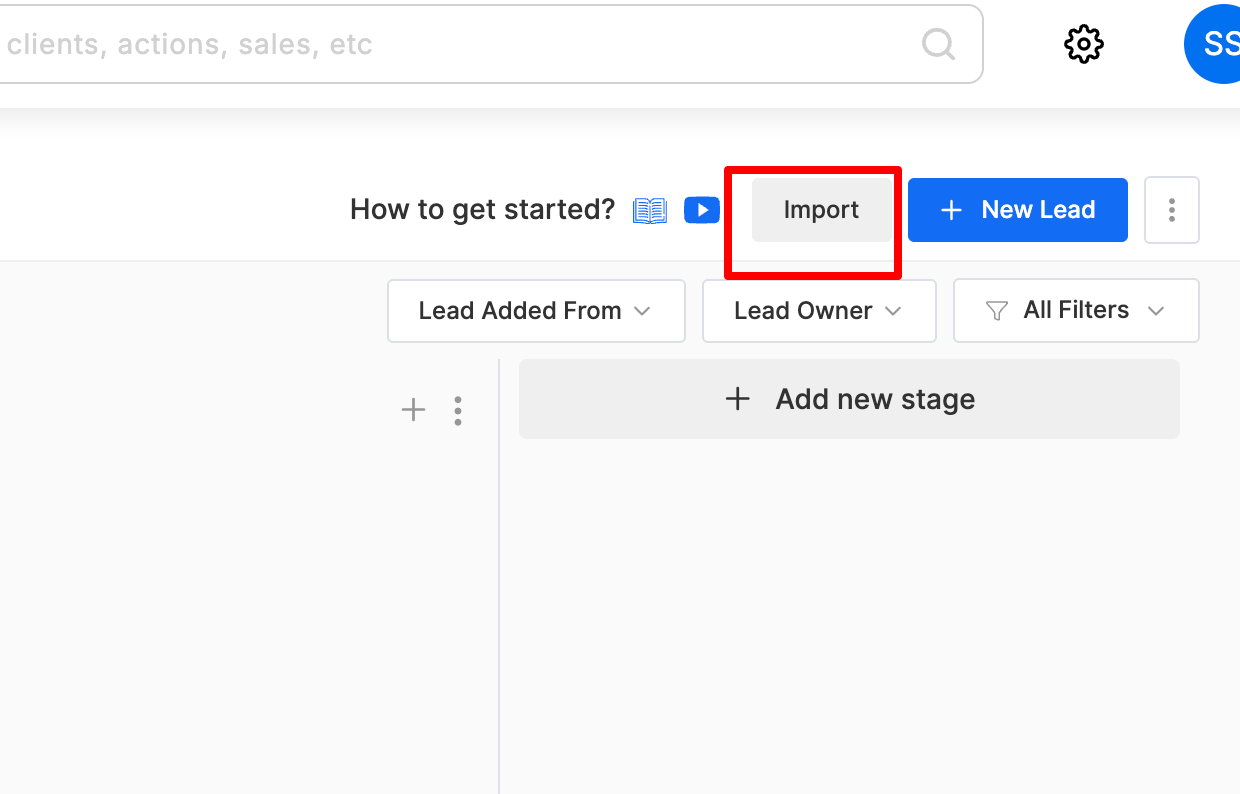
1. Navigate to Import
Go to your Sales Pipeline section.
Click the Import button in the top-right corner.
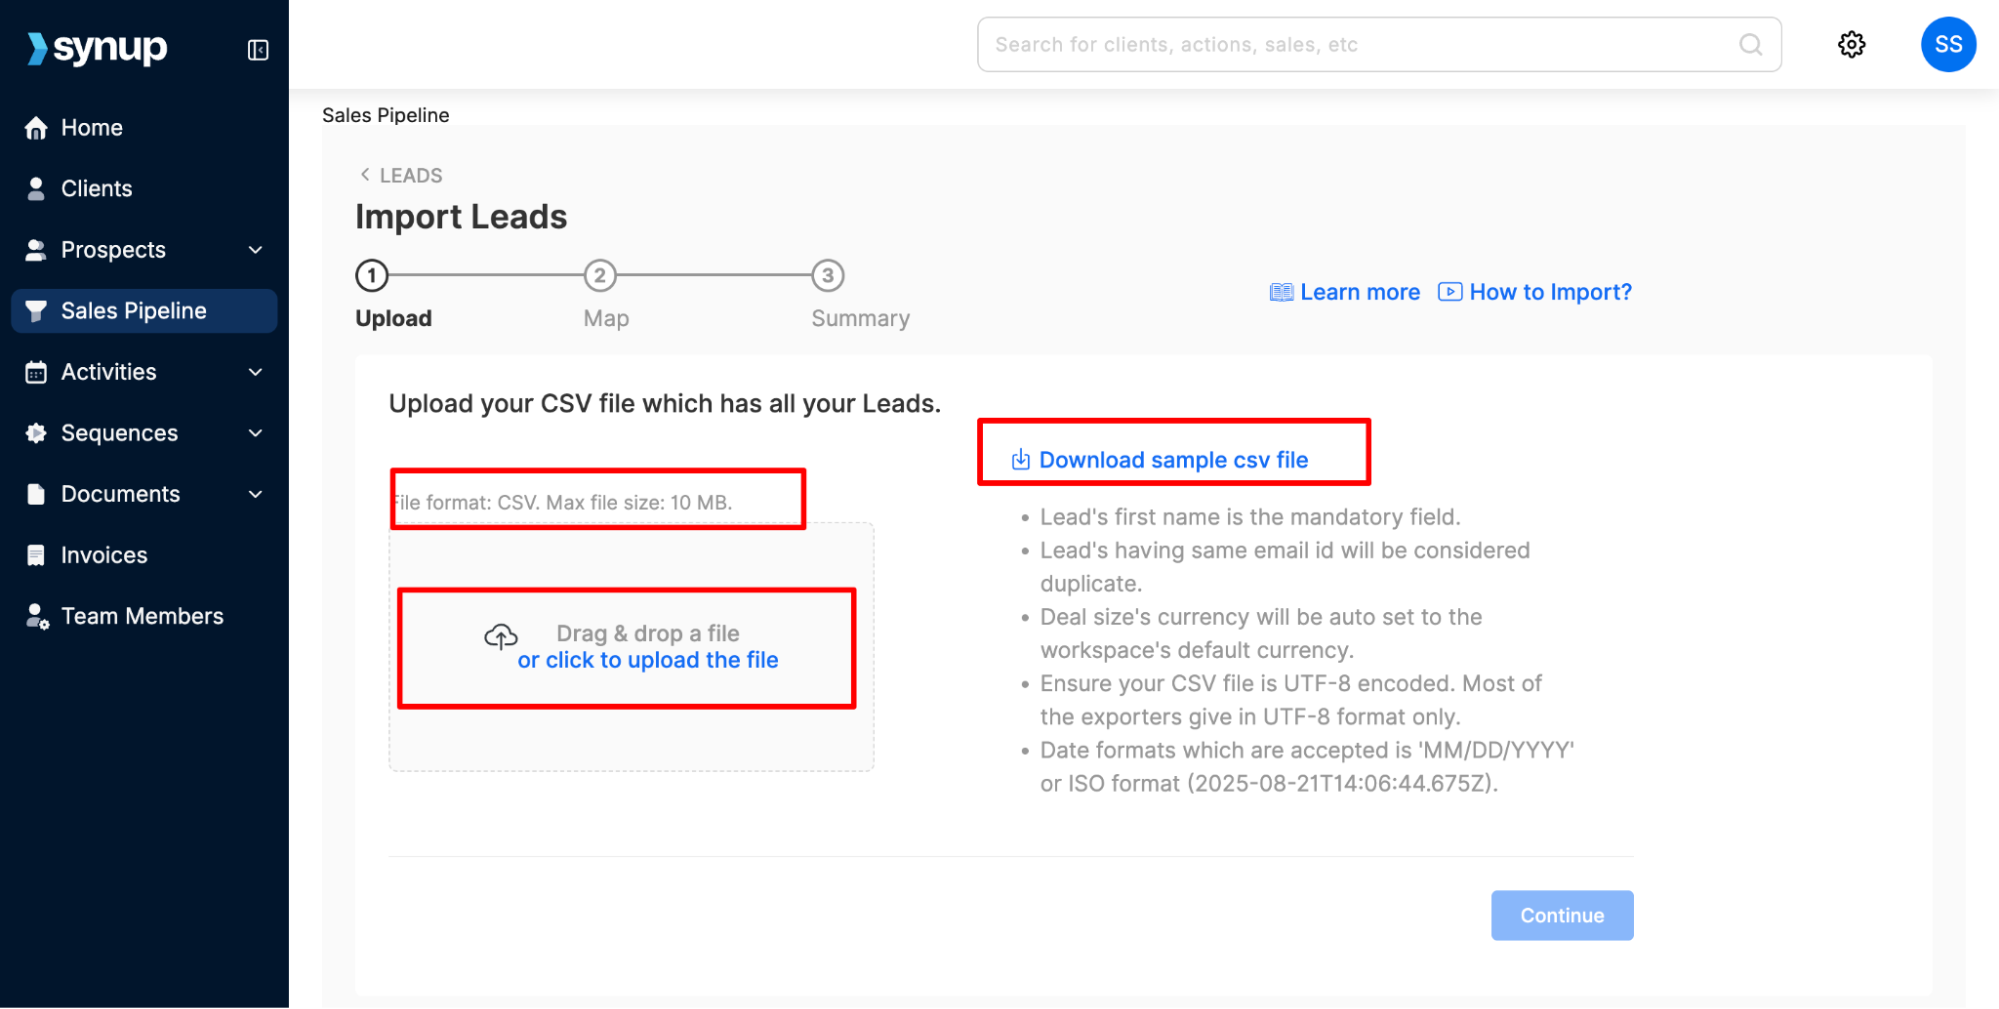
2. Read the Instructions
A screen with import guidelines will appear.
Carefully review the instructions.
You can also download a sample CSV file to see the expected structure.
3. Upload the CSV File
Click Upload File or drag and drop your CSV file.
Ensure the file size is under 10 MB.
If larger, split the data into multiple files.
Once uploaded, you’ll see a preview of your file.
Click Continue.
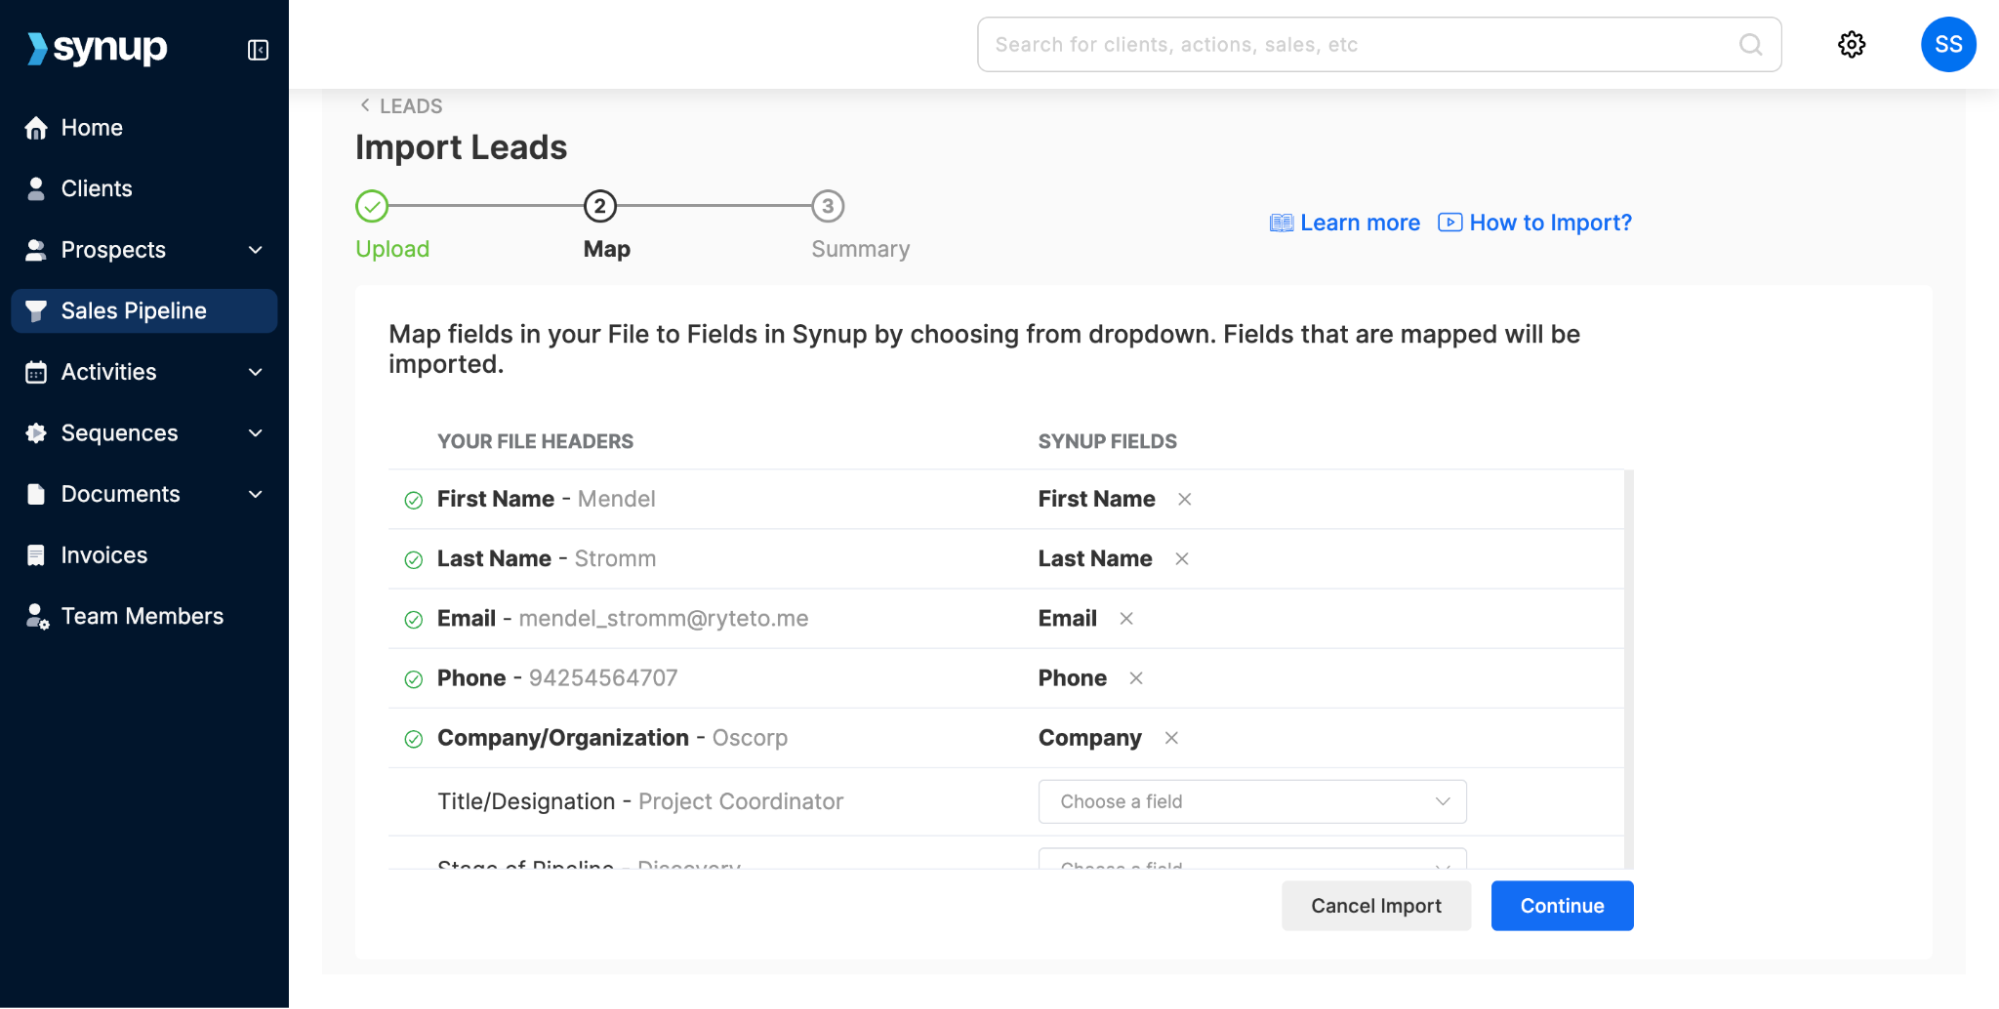
4. Map CSV Headers to Fields
You’ll now see your CSV headers along with a sample record from your file.
Next to each header, use the Choose a Field dropdown to map it to the correct OS field.
All mandatory fields will appear at the top of the list.
Once all mappings are done, click Continue.
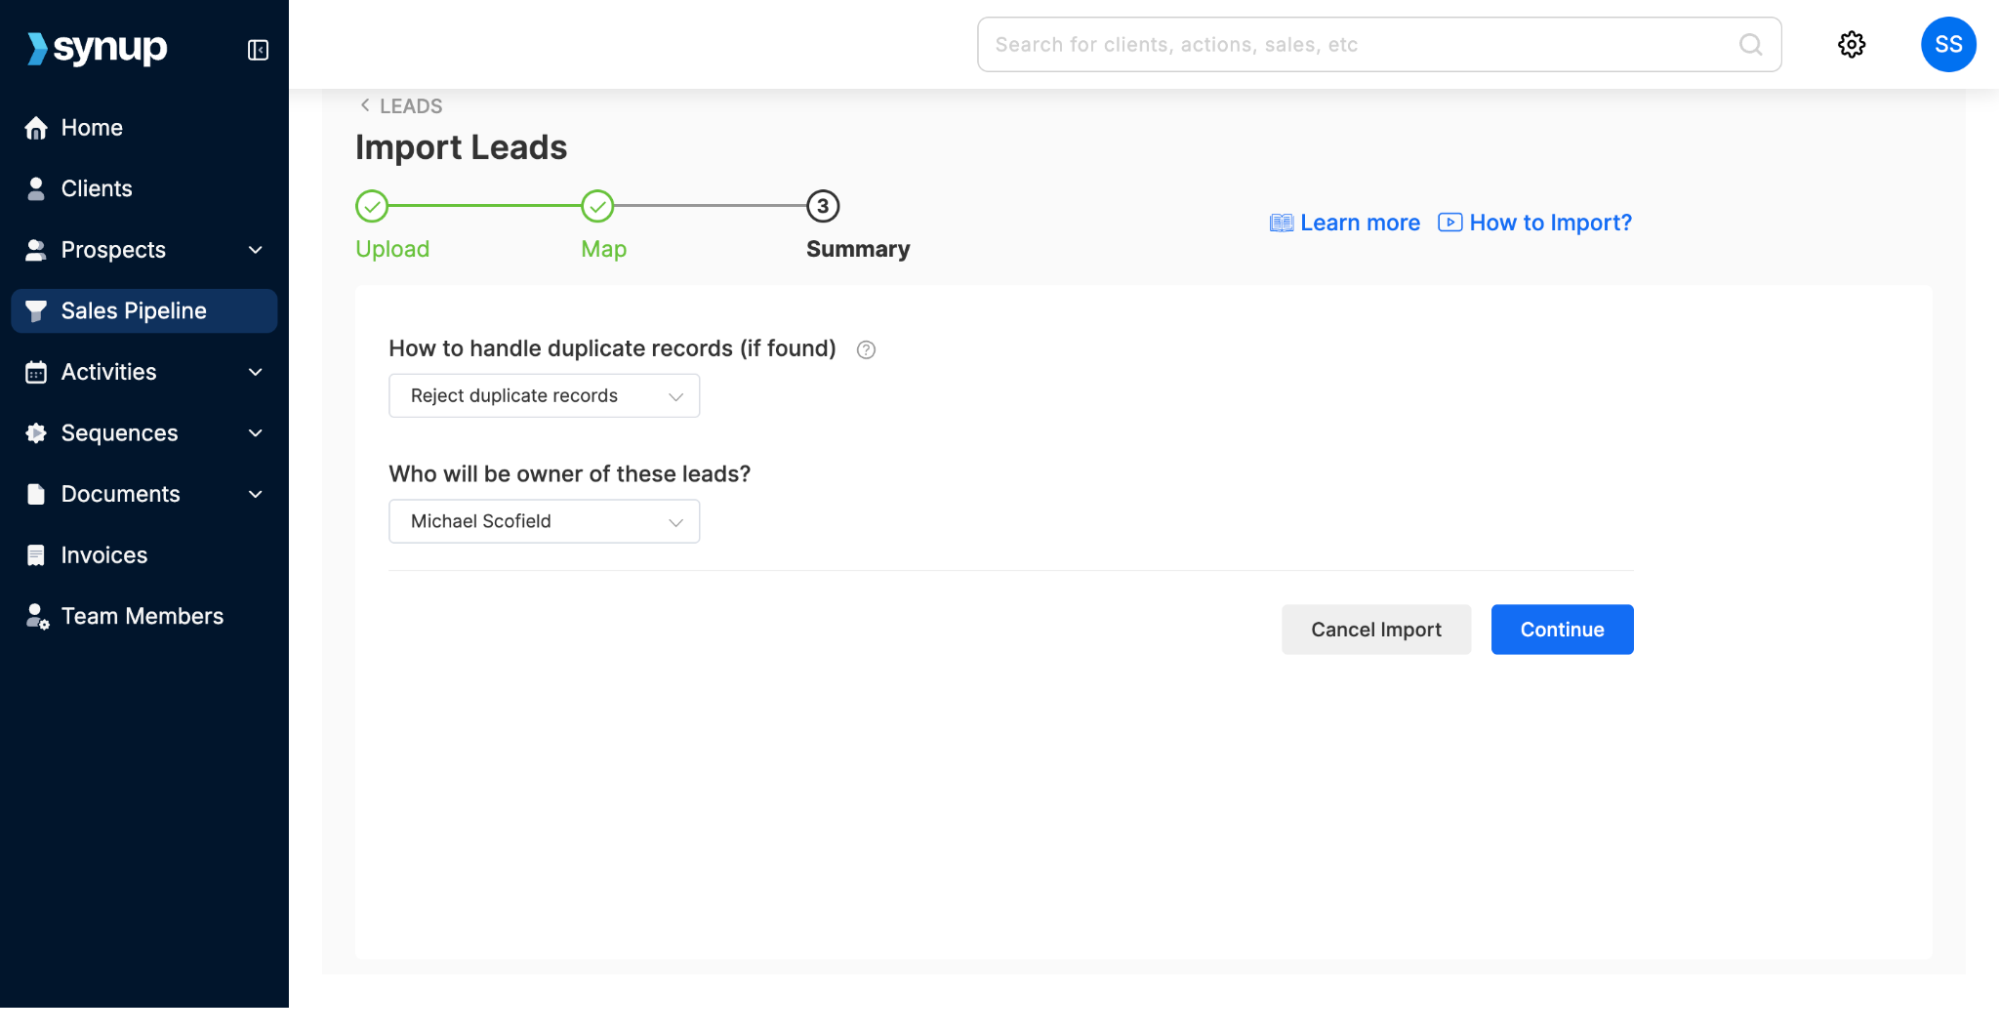
5. Configure Import Settings (Summary Stage)
Decide how to handle duplicates:
Create duplicate records
Ignore duplicate records
Assign an owner:
Choose a teammate who will own the imported leads.
Click Continue.
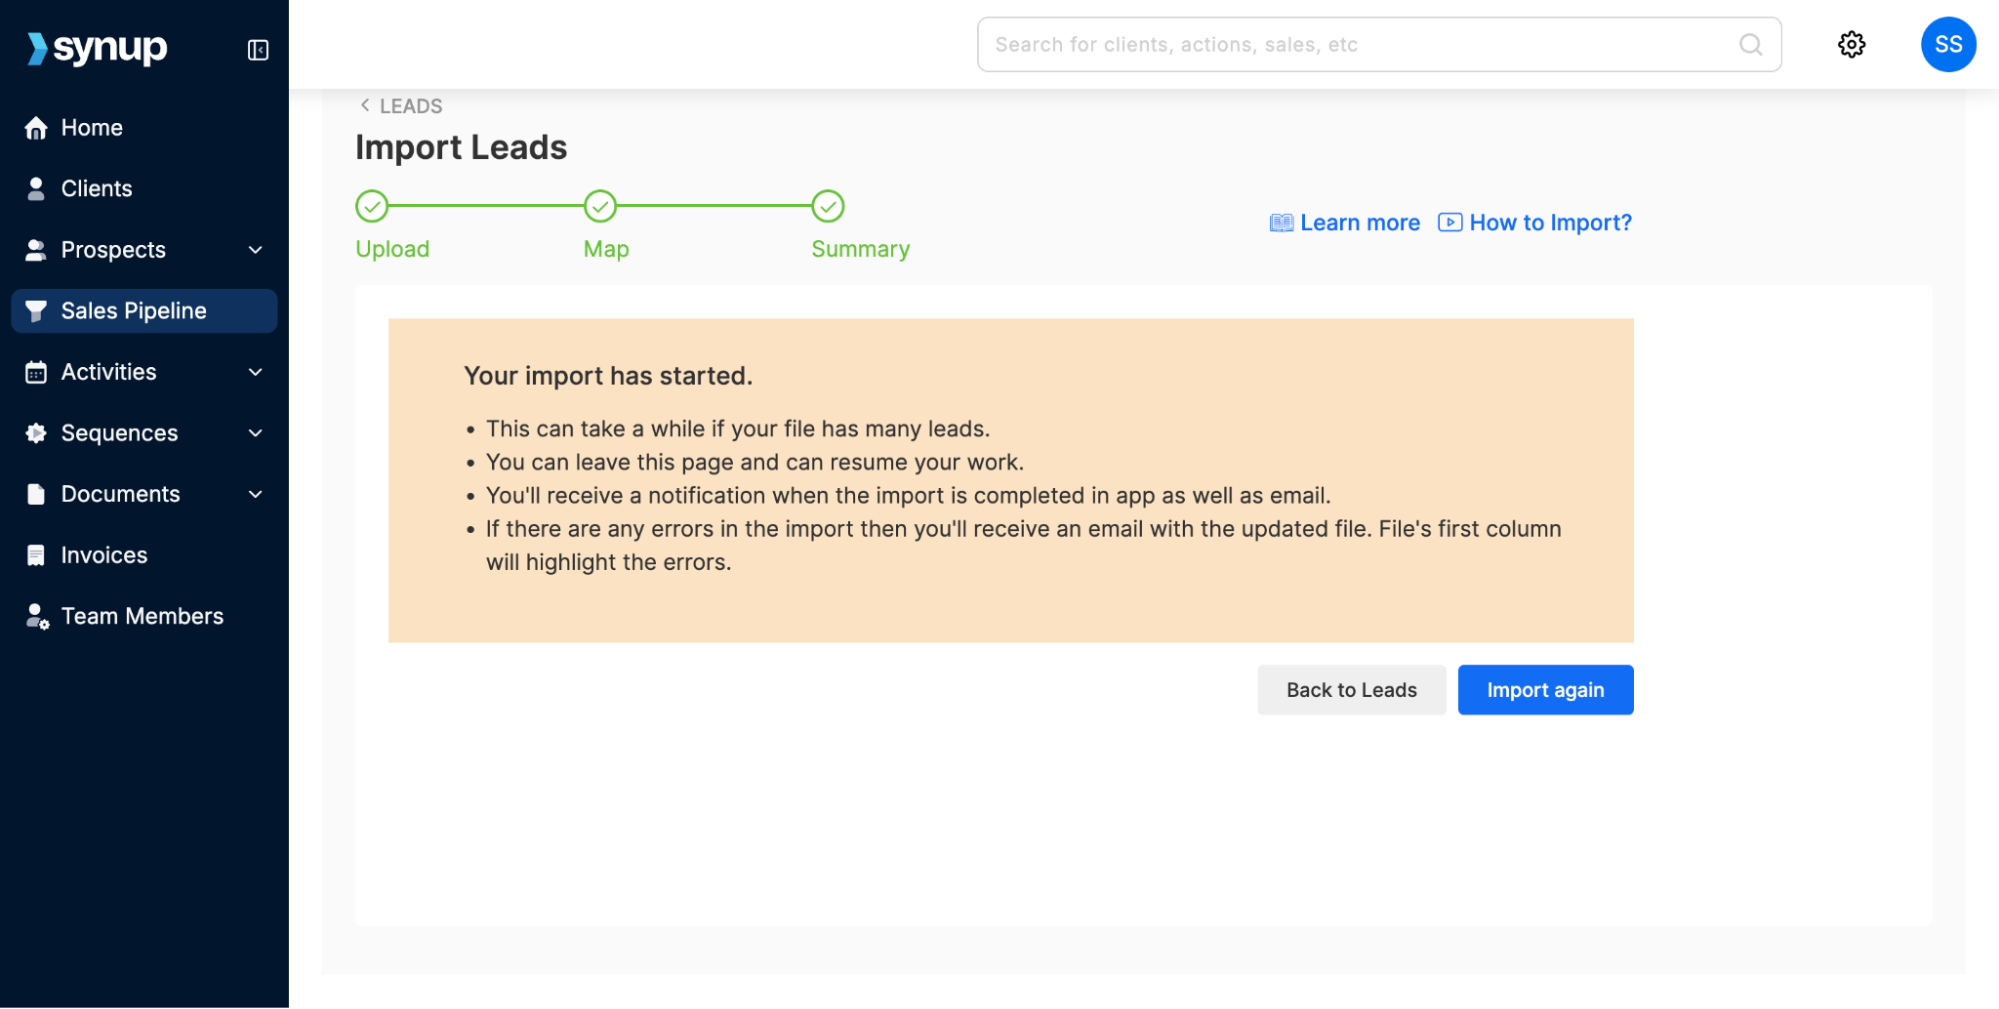
6. Start the Import
The import will now begin.
You can continue working in OS while the process runs.
How to Handle Errors During Import
If there are errors in your import:
You’ll receive an email with the number of failed records.
The email will include an attached CSV file containing only the records with errors.
In this file, the first column will show the error message for each record.
👉 Simply fix the errors in this CSV file and re-upload it to complete the import.
✅ Best Practices
Always test with a small CSV before doing a large import.
Keep your CSV clean and well-formatted to minimize errors.
That’s it! You’ve successfully bulk imported leads via CSV into Synup OS.
How to bulk import leads
Last updated April 29, 2026 · 3 min read
Was this article helpful?