How to share and track an invoice
Sending and tracking invoices is simple with Synup OS, ensuring you get paid faster and maintain a clear record of all transactions. This article will guide you through the process, from creating to tracking your invoice.
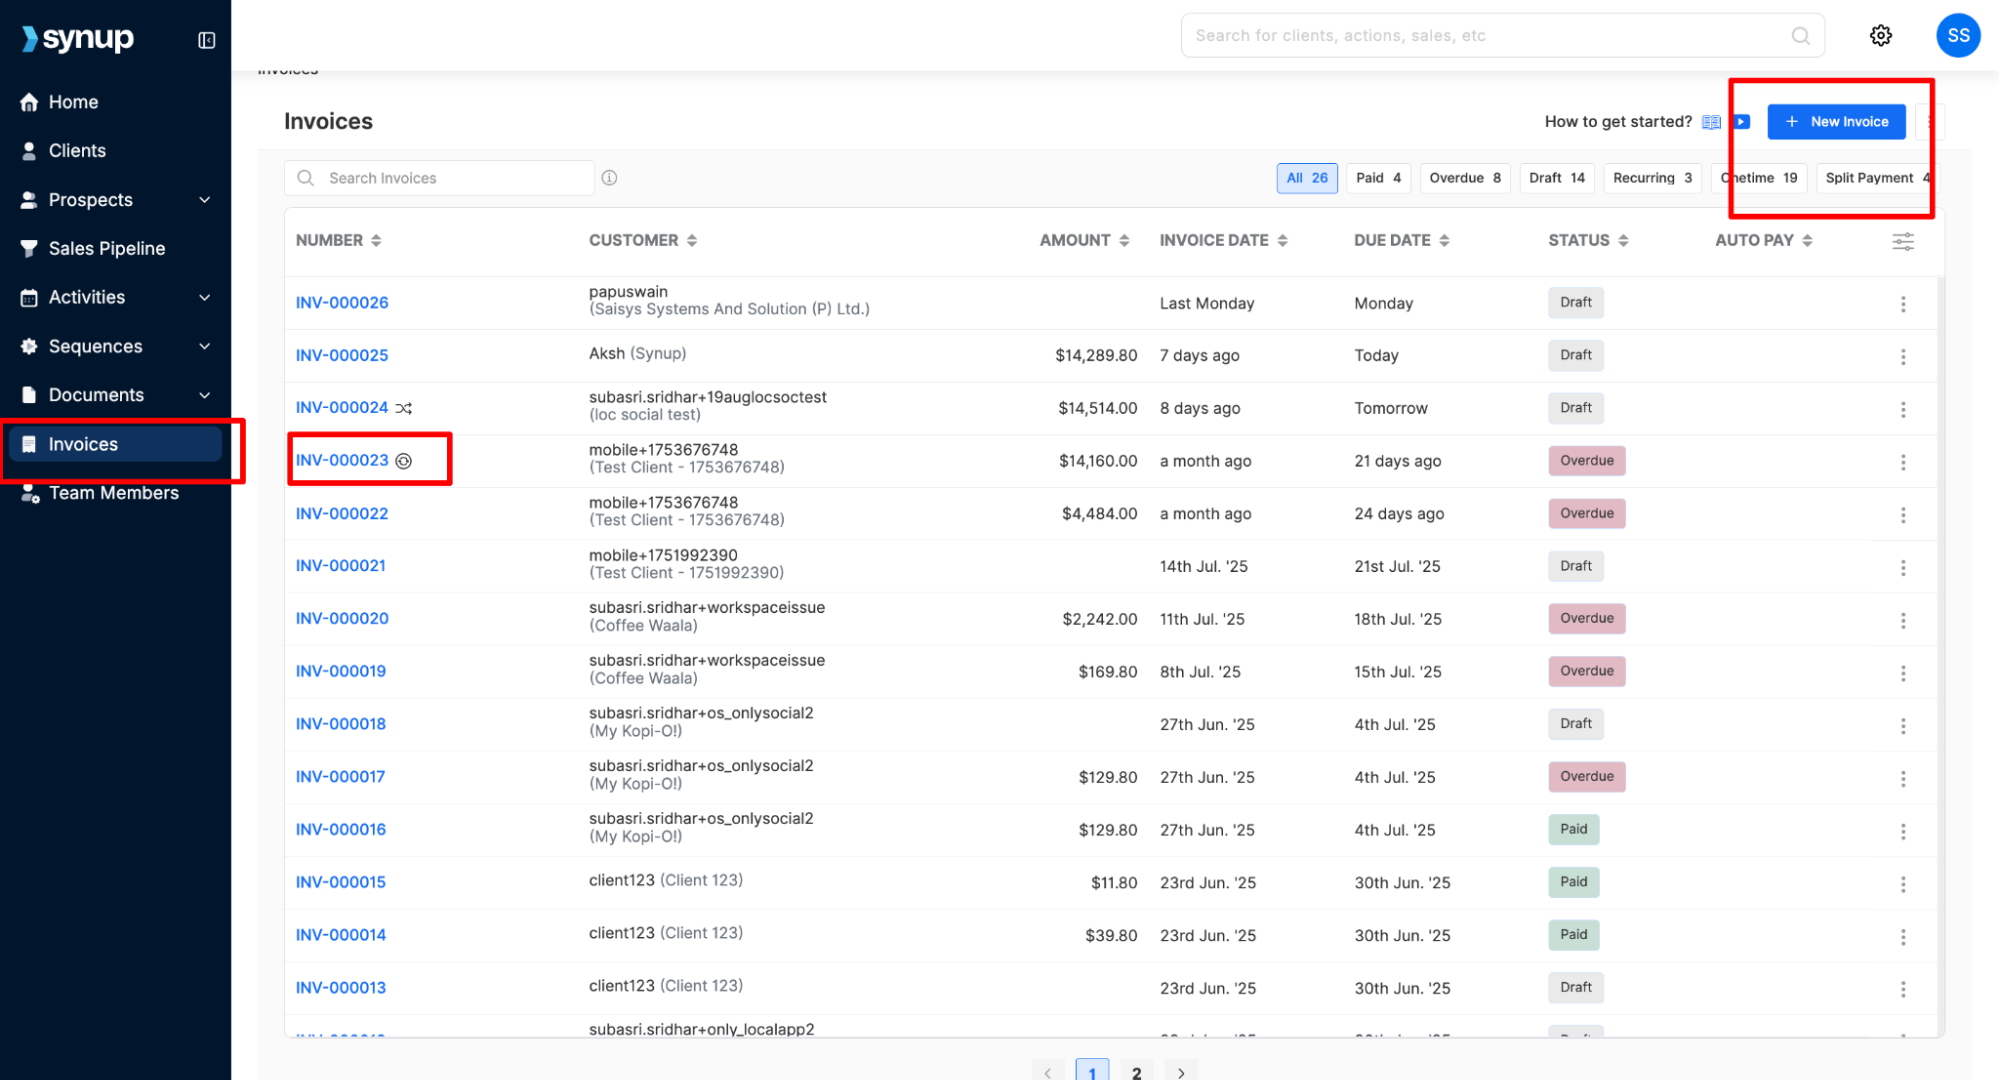
1. Create or Open an Invoice
From the left-hand menu, click on Invoices.
You can then either open an existing invoice from the list or create a new one by clicking + New Invoice in the top-right corner.
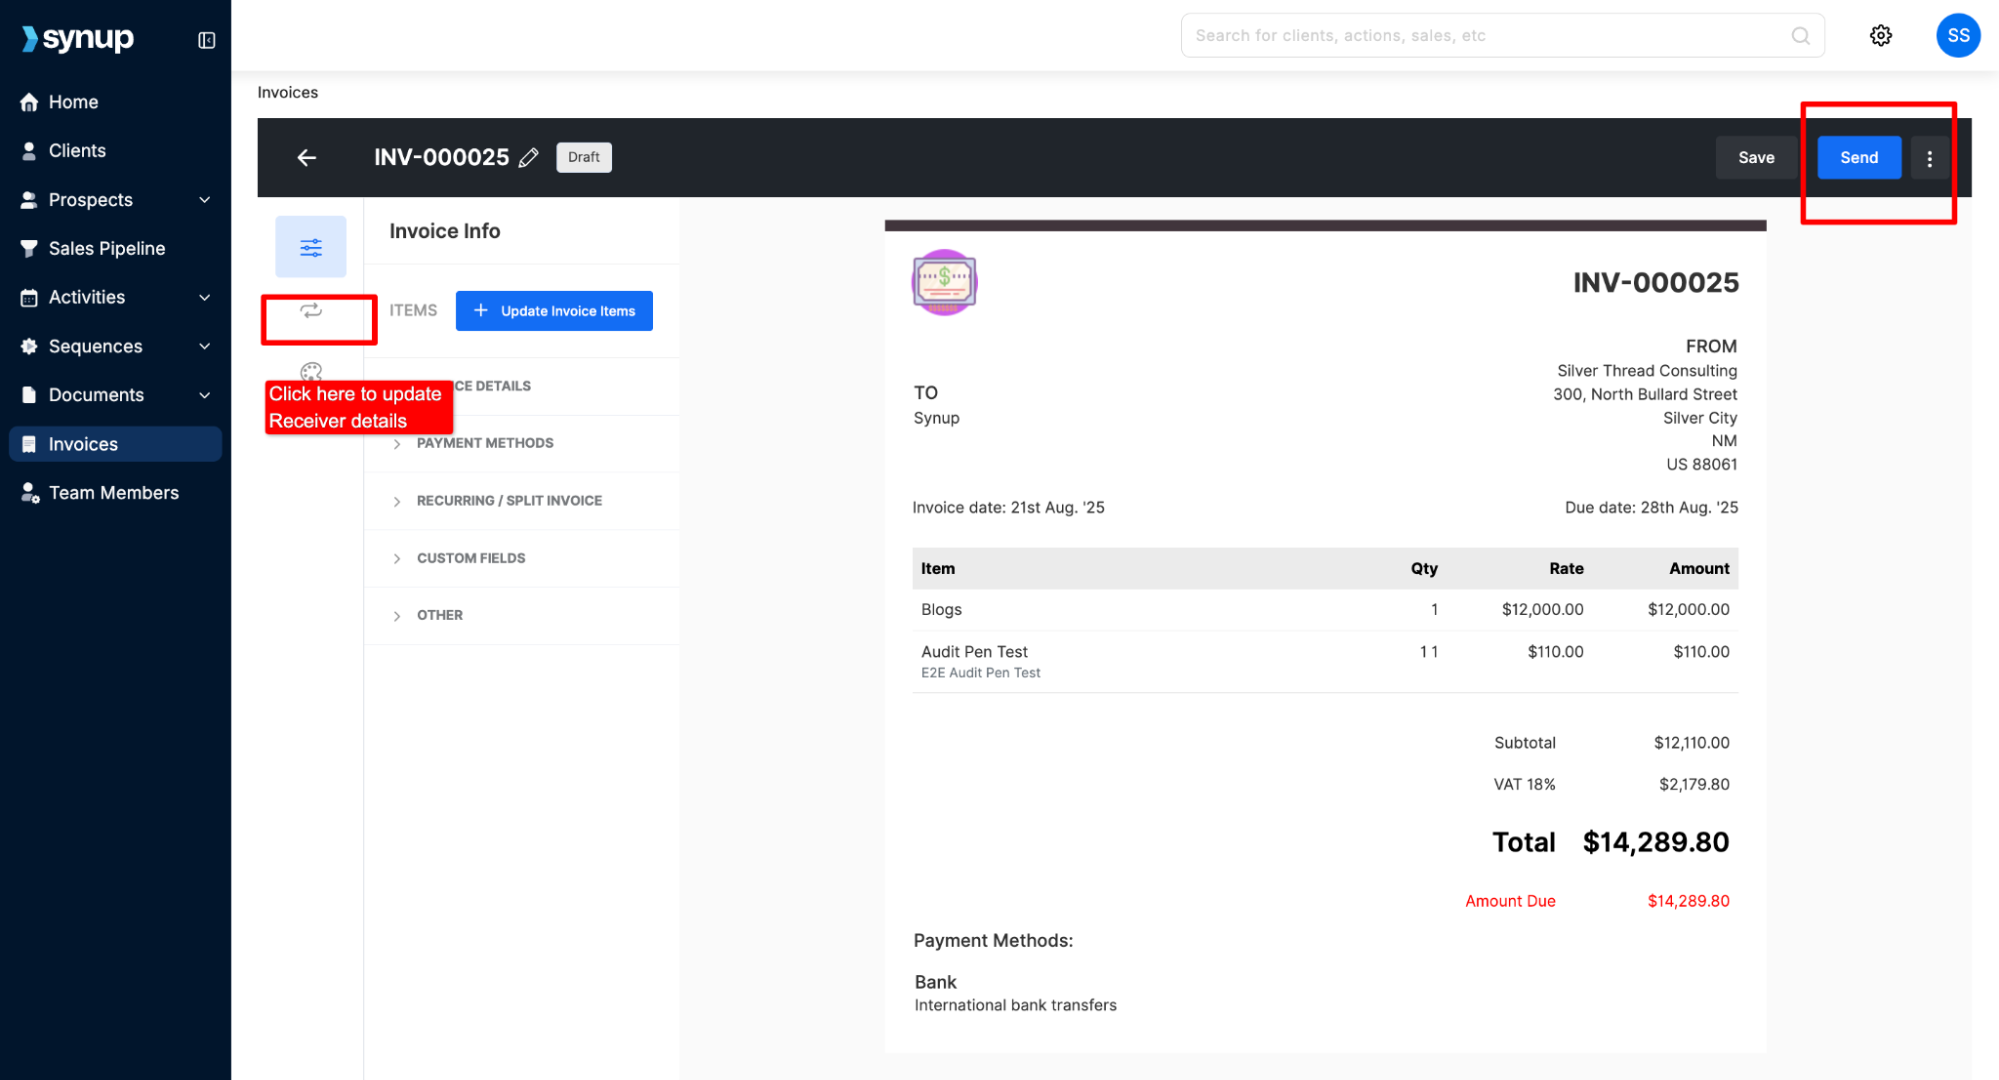
2. Update Invoice Details
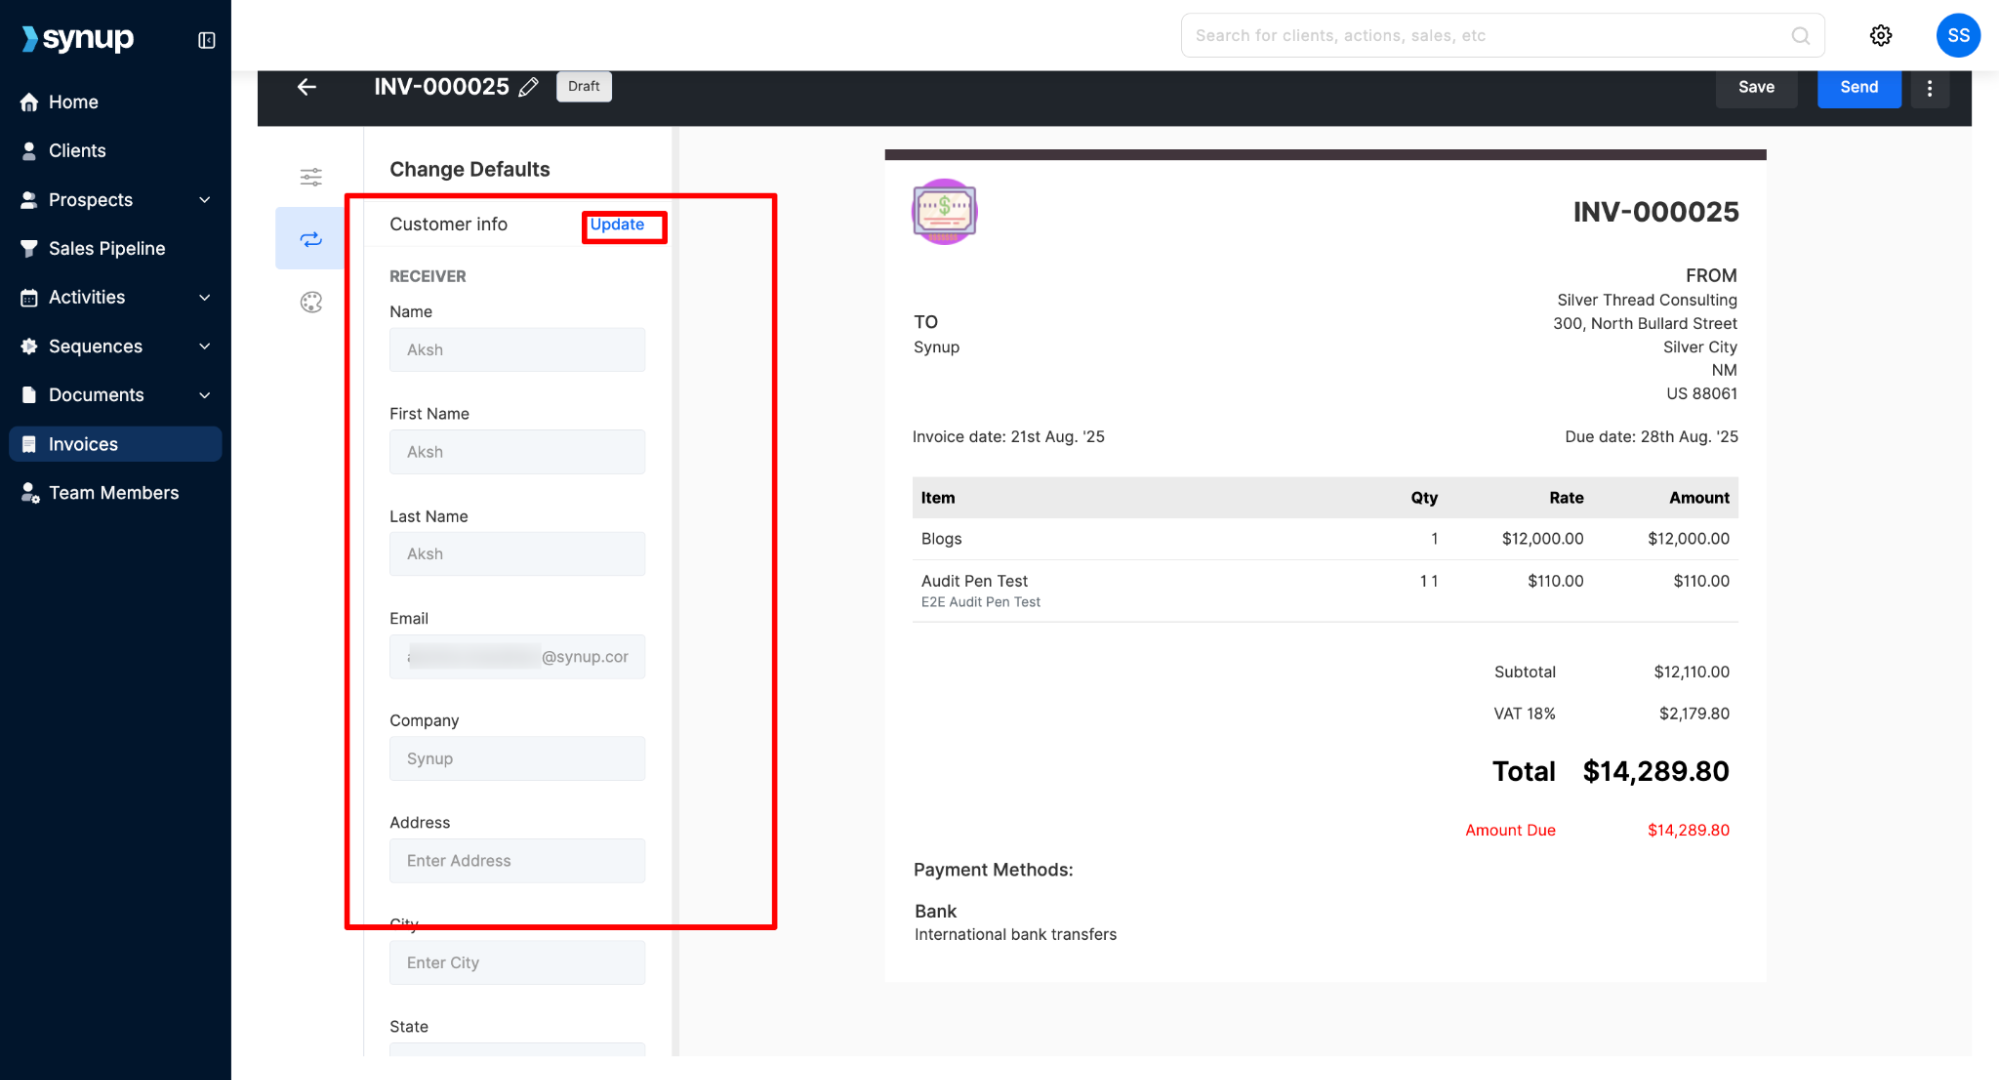
Inside the invoice, you can update the customer information by clicking the Update link in the Customer info section.
You can also click on the Receiver icon (an arrow pointing left) to open the receiver details panel and update the information there.
3. Send the Invoice
When your invoice is ready, click the Send button in the top-right corner.
A "Send Invoice" window will appear. Here, you can customize the email to the recipient.
Click Send to deliver the invoice.
You can also click the dropdown arrow next to the Send button to send a test email or schedule the invoice to be sent at a later time.
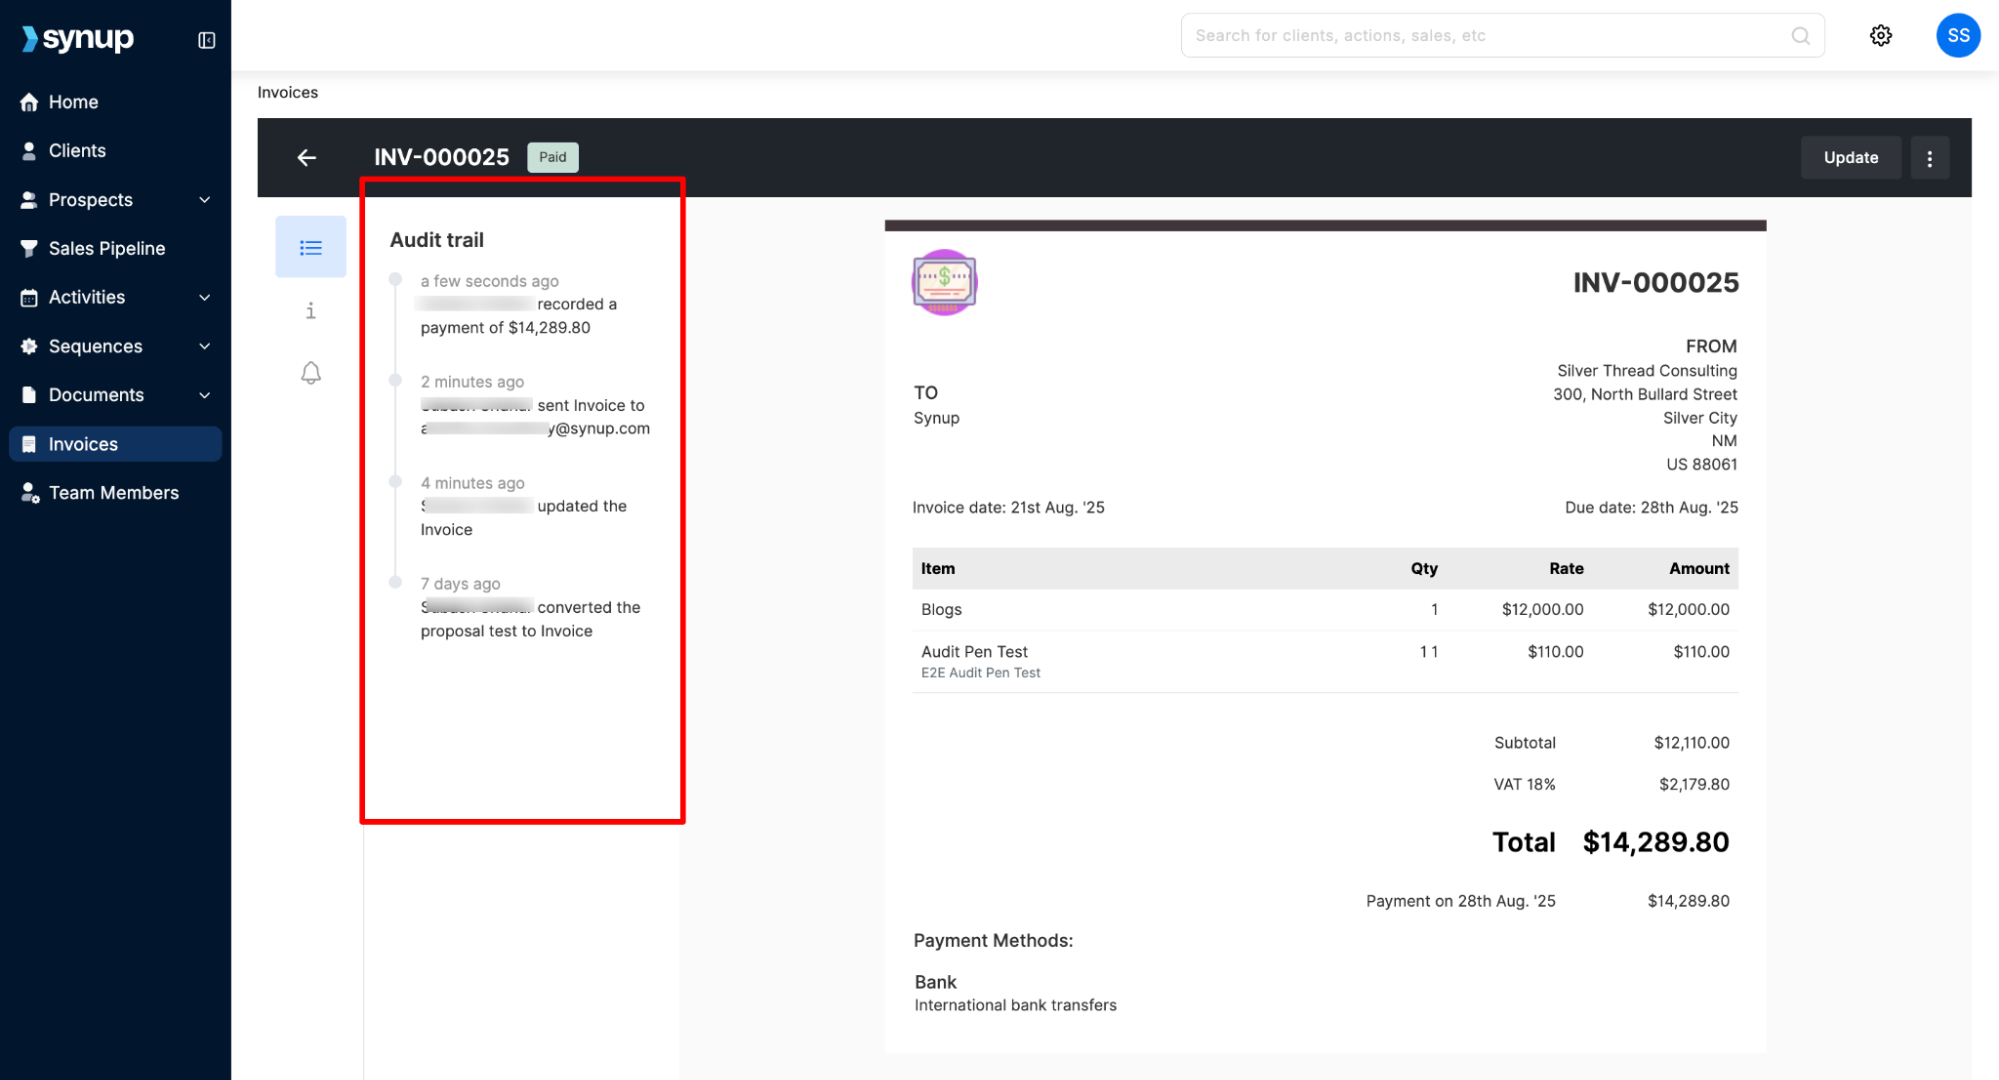
4. Track the Invoice
Once the invoice is sent, you can view its status in the right-hand Audit trail.
This panel provides a timeline of all activities related to the invoice, including when it was sent, opened, when reminders are sent, and if a payment has been recorded. This gives you full visibility and ensures you can follow up as needed.
How to share and track an invoice
Last updated April 29, 2026 · 2 min read

Was this article helpful?